New Grad Planner
Planning your schedule has never been easier! With our new Grad Plan, you can see all your classes organized by semester for your entire degree program.
You can get to Grad Plan from the College Scheduler by clicking on Plan in the left sidebar:

Drag and drop classes to fit your needs, then transfer your plan to College Scheduler with one click!
Here are some additional tips:
Add a Class
Add a Semester
Placeholders
Prerequisites

College Scheduler Overview
-
![Image of course scheduler Plan Schedule page with filter options]()
Set filters by using the ‘Change’ button.
- Course status refers to: open/full or full with open waitlist
Instruction Modes
- Hybrid Zoom and Face-to-Face: Courses which require both synchronous (Zoom at a set time each week) and in-person attendance.
- In-Person: Normal in-person courses.
- Online Course: Asynchronous (student self-pacing/no set time) attendance and coursework.
ONLINE-CES Global Initiative: Courses shared through BYU-Idaho, with BYU-Idaho professors.
- Hybrid Zoom and Face-to-Face: Courses which require both synchronous (Zoom at a set time each week) and in-person attendance.
Sessions
- Regular Academic Session: Taught by Ensign professors.
- BYU-Idaho: Shared course through BYU-Idaho, with BYU-Idaho professors.
- Regular Academic Session: Taught by Ensign professors.
- Course status refers to: open/full or full with open waitlist
-
Once filters are set, click on ‘add course’. Search by subject, instructor, or class number. Click ‘Back’ to return to main screen after you are done adding classes.
Adding courses does NOT mean you are officially registered. You must complete all the steps to register (see instruction overview above).
![Image of Add Course button]()
![Image of options for selecting courses (By subject, instructor, class #)]()
-
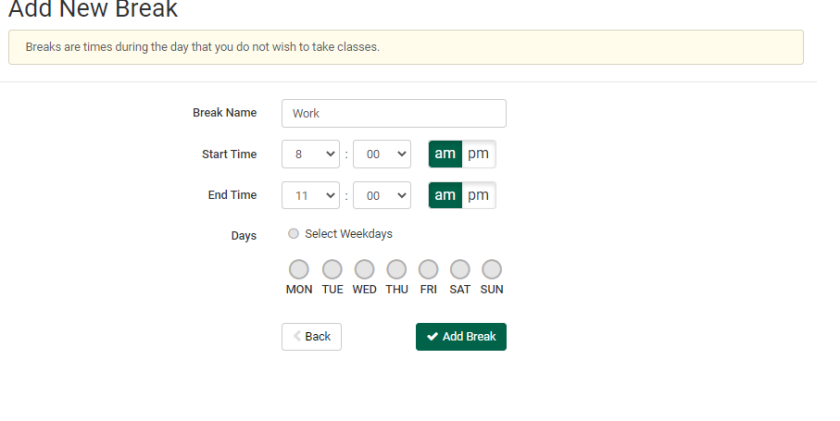
To schedule classes around work, study time, etc., add a break into your schedule by clicking on ‘add break’.
![Image of Add a Break section]()
![Add a new break section]()
-
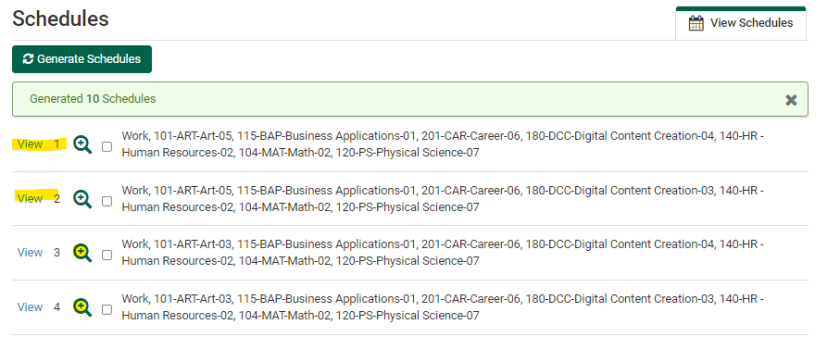
After you have added courses and breaks, click on ‘Generate Schedules’ to view potential schedule options.
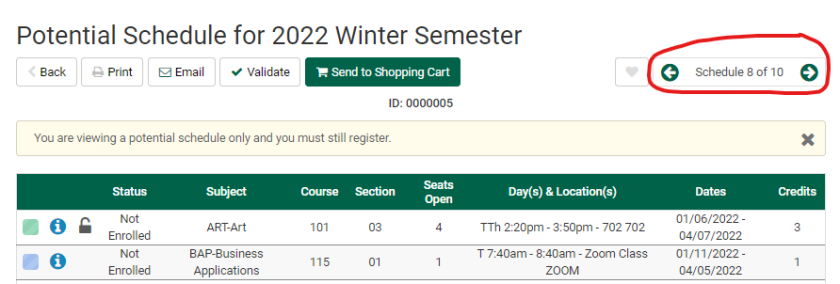
Click ‘view’ to see details of each and the magnifying glass for a visual schedule.
![List of schedules generated with option to view each]()
![Individual view of selected schedule]()
Use the arrows to scroll between schedule options.
-
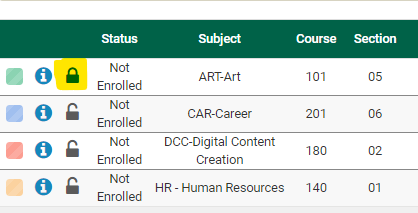
The locking course feature allows you to ‘lock-in’ a desired course section/time as you are searching schedule options. Open the ‘view’ option next to a schedule and click on the lock icon next to the course. Re-generated schedule options will now only show options which include locked courses.
![Image of lock icon used to lock in a class time]()
-
Before officially attempting to register, it is a good idea to ‘validate’ your classes. Validating checks to make sure you have met all the requirements to enroll in a course.
![Image of screen with validate button]()
![Screen showing whether requirements are met to enroll in selected classes]()
-
After you validate your courses, click on ‘Send to Shopping Cart’ to save your schedule.
![Image of Send to Shopping Cart Button]()
![Image of Shopping Cart containing selected classes]()
-
Use College Scheduler to edit and drop courses.
Click on ‘Current Schedule’ and ‘Edit or Drop Classes’.
![Image of button to edit or drop classes in current schedule]()
Choose which course you want to drop, then click ‘Save’.
![Image of checkbox to select in order to drop a class]()
-
Use College Scheduler to waitlist a full course.
Click on ‘Generate Schedule’ and you will see the class ‘Seats Open’ in red. Click ‘Send to Shopping Cart
![Waitlisting 1.png]()
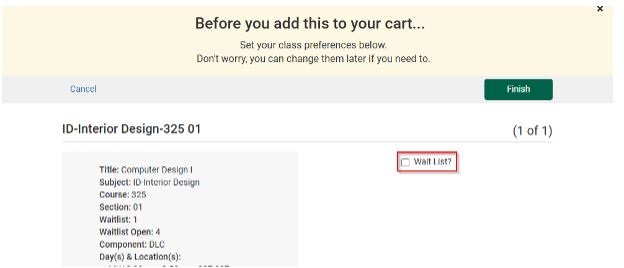
Check the box called ‘Waitlist’ then click ‘Finish’.
![Waitlisting 2.png]()


